Video Creation |
 
|
Video Creation |
|
The AVI Studio program is quite intuitive to use, and once you have mastered the basic functions, you should be able to create reasonably complex videos with relative ease. You are referred to the online help within the AVI Studio program for a full description of its functionality.
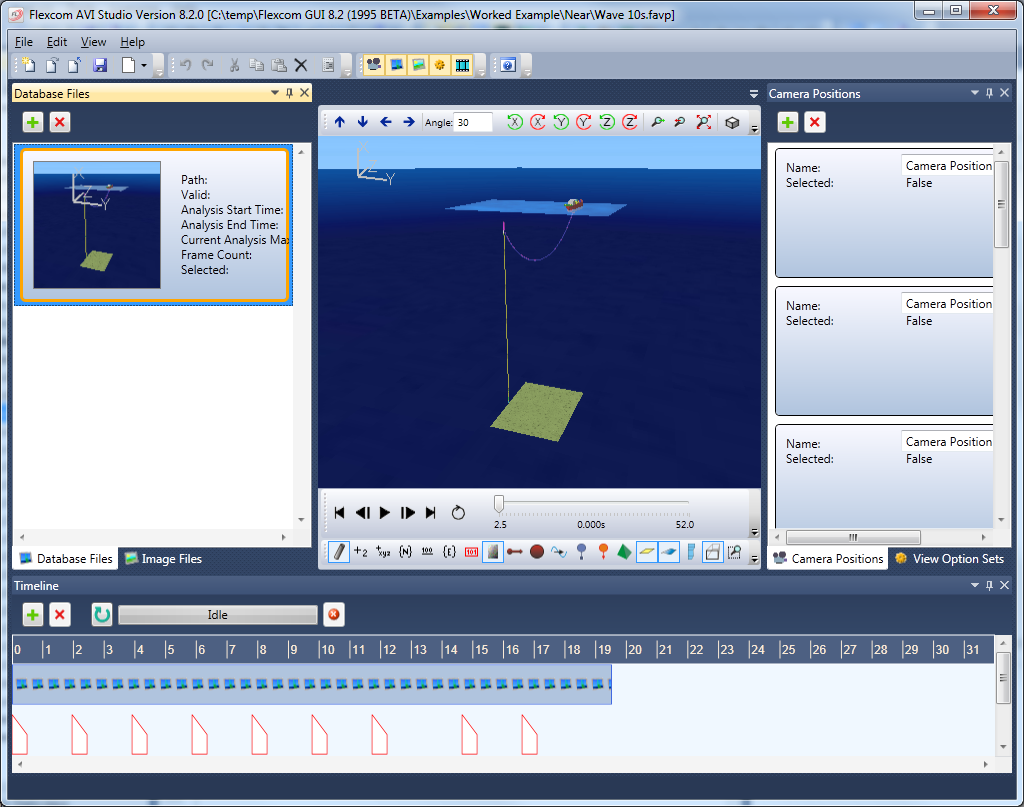
A sample layout for the AVI Studio is shown below. This includes the following windows (listed in order of appearance, from top left towards bottom right): Database Files, Preview, Camera Positions and Timeline. Also included but currently hidden are the Image Files and Option Sets windows.
For illustrative purposes, a sample AVI project file is included with this worked example, based on the combination of near vessel offset and 8s regular wave period.
For the purposes of this example, 14 camera positions were created to give an overall view of the complete structure and some close-up views of the various components.
•The first camera position specified is entitled ‘Full View’. The camera is positioned to give an overall view of the entire structure, as illustrated above.
•The next five camera positions, ‘Vessel 1’ to ‘Vessel 5’, provide various views around the vessel.
•‘Under Vessel 1’ and ‘Under Vessel 2’ provide detailed views of the underside of the vessel, showing the vessel ends of the oil and gas jumpers.
•The ‘Half View’ camera position provides a view of the vessel and the buoy, similar to the ‘Full View’, but at a higher zoom level, and from a different viewpoint.
•The next camera position ‘Buoy 1’ gives a closer view of the buoy.
•‘Buoy Detail 1’ provides a detailed view of the components beneath the buoy, namely the T-frame and buoy ends of the oil and gas jumpers.
•The camera position ‘Buoy Detail 2’ looks underneath the buoy.
•Camera positions ‘Buoy 2’ and ‘Buoy 3’ give some different viewing angles around the buoy.
Option Sets allow you to vary some display parameters at different stages during the video. For illustrative purposes, two option sets have been created in this example, namely ‘Show Node Labels’ and ‘Hide Node Labels’. These are used to switch on and off node lables at various stages during the video. For example, node labels are used to accompany the camera positions ‘Under Vessel 1’, ‘Under Vessel 2’ and ‘Buoy Detail 1’. This provides additional clarity to the video, highlighting pertinent components/connections within the model.
The timeline is assembled as follows.
Time |
Database |
Camera |
Option Set |
0s |
Wave 08s.dbm |
Full View |
Hide Node Labels |
4s |
Vessel 1 |
||
8s |
Vessel 2 |
||
12s |
Vessel 3 |
||
15s |
Vessel 4 |
||
17s |
Vessel 5 |
||
19s |
Under Vessel 1 |
Show Node Labels |
|
22s |
Under Vessel 2 |
||
23s |
Hide Node Labels |
||
26s |
Half View |
||
29s |
Buoy 1 |
||
33s |
Buoy Detail 1 |
Show Node Labels |
|
37s |
Buoy Detail 1 |
Hide Node Labels |
|
40s |
Buoy Detail 2 |
||
43s |
Buoy 2 |
||
46s |
Full View |
||
48s |
Full View |
While the AVI Studio project is provided with the installation, the AVI file itself must be generated locally before you can view the AVI video. You may create the video by pressing the ![]() button in the Timeline view. The options are fairly self-explantory, but you may refer to the online help if you require any further information. In order to ensure the size of the resulting AVI file is reasonable, video compression is recommended, and you may select from a range of standard codecs.
button in the Timeline view. The options are fairly self-explantory, but you may refer to the online help if you require any further information. In order to ensure the size of the resulting AVI file is reasonable, video compression is recommended, and you may select from a range of standard codecs.