Using the Cloud Platform |
 
|
Using the Cloud Platform |
|
The following is a step-by-step guide for software users and these instructions should be circulated amongst the local engineering team. Running Flexcom on the cloud is straightforward and requires little or no training. However, there are several aspects which are worthy of further discussion.
1.Begin by launching an internet browser. Any of the standard browsers (e.g. Chrome, Firefox, Internet Explorer etc.) may be used, provided it is a relatively recent version which supports HTML5.
2.Log on to the Wood portal using your unique email address and password.

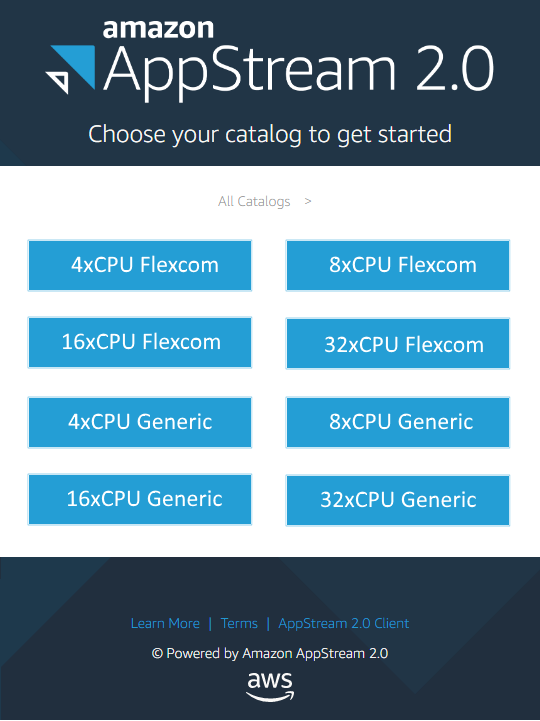
3.Select the machine specification which you require. Please note the following:
a.Flexcom machines naturally cost more than generic machines, as the hourly rate includes a license fee for using Flexcom itself, plus a fee for using the computational power provided by Amazon Web Services. Generic machines allow you to perform a variety of non-Flexcom related tasks (e.g. uploading, downloading, zipping, custom pre- and post-processing etc.) at a much lower hourly charge rate.
b.Higher specification machines cost per more per hour than lower specification ones.
c.Usage charges take effect as soon as the machine has been spun up on the cloud, and persist until the session is terminated.
d.Your organisation is being billed per hour regardless of whether you are using the virtual machine or not. So do not create a machine if you do not intend utilising it.
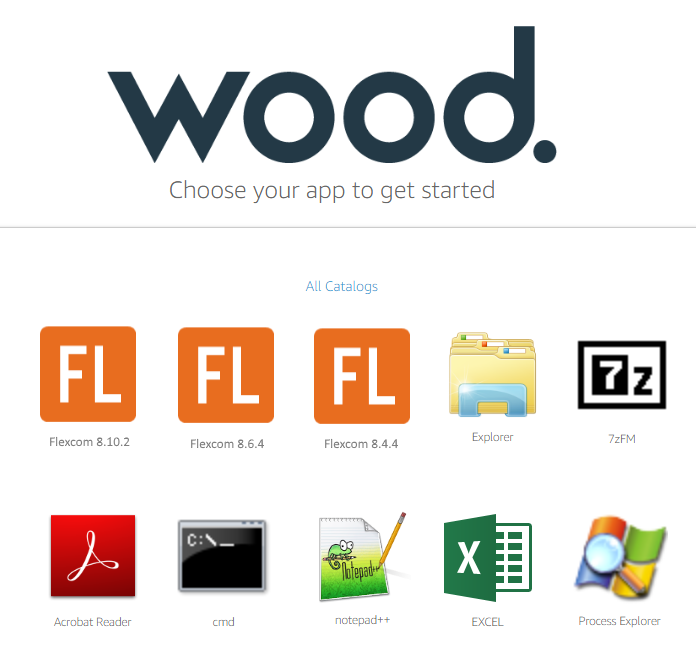
4.Select the application which you wish to begin using initially. Once the cloud session has become established online, you will be able to launch other applications as well, so it doesn't really matter which application you select at this point.
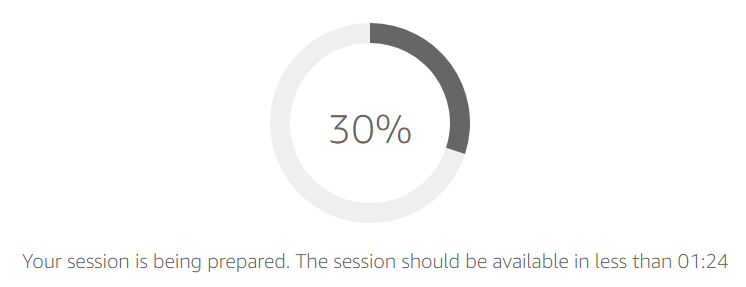
5.Now you must wait while for your chosen machine is being spun up on the cloud. Boot times are quite quick, normally it takes somewhere between 1 and 2 minutes.
![]()
From left to right, these buttons represent:
•Launch app – allows you to launch other software applications
•Switch windows – allows you to bring a different window into the foreground, similar to the Alt-TAB key combination on a normal desktop computer
•My files – allows you to upload and download files between your desktop and cloud machines
•Clipboard – allows you to copy and paste data between your desktop and cloud machines
•Settings – allows you to change some general settings (rarely required)
•Enter fullscreen mode – allows you to switch into full screen viewing mode. Press the ESC key to revert to normal window mode
The following types of online data storage are available on the cloud platform. It is important that you understand the role and operation of each storage type.
•‘Temporary/Transient’ - this is effectively the local hard drive on an active cloud machine. Also known as ephemeral storage, it reverts to its initial state once the user session has finished. In other words, any data stored here is deleted once the user session ends. It has a maximum storage capacity of 150 GB, and a maximum lifespan of 96 hours (equal to the maximum session duration). There is no cost associated with temporary storage, as the costs are built into the hourly rates for computational time on the cloud platform. It is important to note that any data contained in temporary storage must be transferred to another storage area before the active user session is terminated - otherwise it is lost permanently and cannot be recovered. If the user is transferring large amounts of data, sufficient time should be allowed for the file transfer process to fully complete before the active session duration approaches the maximum timeout (96 hours). For efficiency, the use of automated file transfer scripts is recommended to periodically transfer data while a Flexcom batch run is in progress, rather than performing one large file transfer manually following the final completion of the Flexcom batch run.
•'Permanent/Cold' - this is everlasting storage which is associated with each user account. Any data saved here persists after the user has logged off from the cloud portal. The size of the storage area, and its lifespan, are both unlimited. This is the most economical means of data storage as the storage costs (which are charged per GB per hour) are very low. It is important to note that active Flexcom simulations cannot be hosted within the cold storage area - these must be performed in another storage area with the data transferred into cold storage afterwards. Data stored in permanent storage is private to the user, and cannot be viewed by other users.
•'Persistent/Hot' - this is an active storage area which also persists once after the user has logged off from the cloud portal. It is effectively a hybrid version which combines the best features from temporary and cold storage into a single offering. The size of the storage area is finite (1TB is a popular option), although its lifespan is unlimited. It is a more expensive means of storage than cold storage (there is a fixed charge per month, which depends on the storage capacity) but it alleviates any concerns regarding potential data loss from temporary storage. It also has the advantage that data stored in hot storage is visible to all nominated users of the cloud platform (i.e. it is effectively a shared drive). The storage capacity should be carefully chosen by IT personnel in consultation with the engineering manager.
Storage Type |
Max. Capacity |
Max. Lifespan |
Cost |
Access |
Temporary/Transient |
150 GB |
96 hours |
Free |
Single user |
Permanent/Cold |
Unlimited |
Unlimited |
Low (charged per GB per hour) |
Single user |
Persistent/Hot |
Finite (e.g. 1 TB) |
Unlimited |
Moderate (fixed amount per month) |
Multiple users |
Data Storage Types
Using the 'Launch app' button, you can open Windows Explorer. This allows you to view the entire contents of your cloud machine, similar to viewing your hard disk on your local machine.
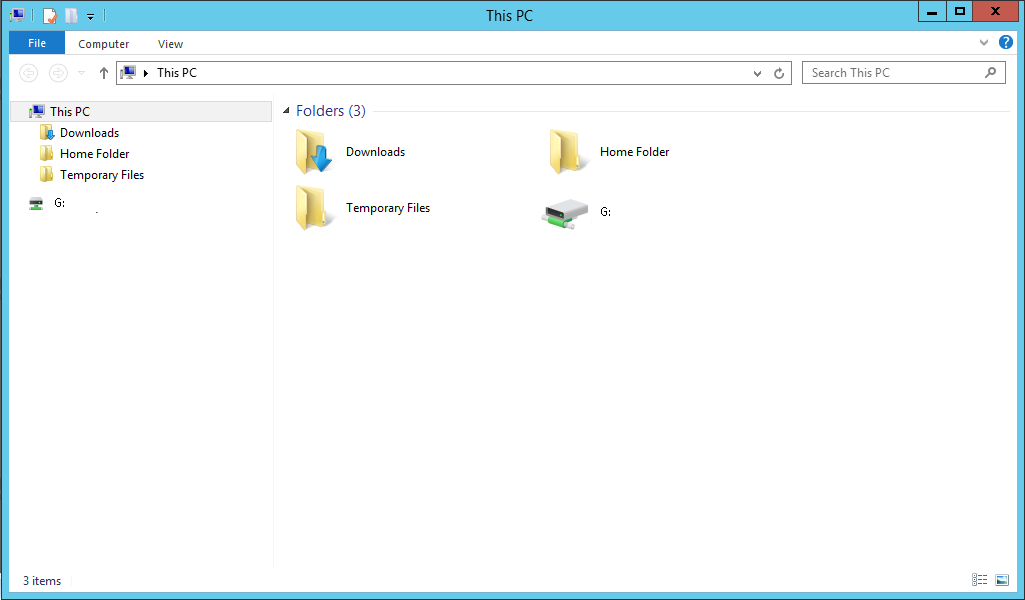
Here you will see high level folders called 'Temporary Files' and 'Home Folder', and drive which is labelled G: or similar. These areas correspond to the storage types described above. Note that you can create as many sub-folders as you wish to organise your data.
•Temporary Files -> Temporary/Transient storage
•Home Folder -> Permanent/Cold storage
•G: drive -> Persistent/Hot storage
Please note the following points:
•The maximum capacity of 'Temporary Files' is 150 GB. You should check the maximum capacity of 'G: drive' using Windows Explorer and remain conscious of this limit also.
•If you are working in 'Temporary Files', it is imperative that you save your data to 'Home Folder' or 'G: drive' so that it persists after you have logged out. Alternatively, you may download it to your desktop computer. For efficiency, the use of automated file transfer scripts is recommended to periodically transfer data while a Flexcom batch run is in progress, rather than performing one large file transfer manually following the final completion of the Flexcom batch run.
•The maximum time limit for each user session is 96 hours. If you anticipate that a Flexcom batch run will take more than 96 hours to complete, then you should sub-divide it up into a number of smaller batches.
•The session will automatically terminate after 96 hours, if you have not manually terminated it previously, regardless of what computations are in progress at that point. All data contained in 'Temporary Files' will be automatically deleted at that point.
•Once an engineering project has completed, you should consider an efficient archiving scheme. For example, you could store all Flexcom data files for some time after completion of the project in permanent/cold storage. Beyond that point, you may wish to delete bulky output files and only retain the input files. Flexcom provides a ‘Clean Directory’ option which could be useful in this context.
File transfer is facilitated by the ‘My files’ window.

To upload files to your cloud machine, click on ‘Temporary Files’ to move the focus into that folder (or one of its sub-folders), then simply drag files into the ‘My files’ window from Windows Explorer on your desktop machine (this is particularly easy if you have 2 monitors attached to your desktop computer). Alternatively you may click the 'Upload Files' button on the top right of the ‘My files’ window, and this will allow you to browse your local hard disk.
As it is only possible to upload (or download) one file at a time, you should use the 7-Zip file archiver to create a single compressed ZIP file on your desktop machine before uploading to the cloud. 7-Zip is an open source tool which is free to use. If you do not already have it installed on your computer, you may download it from the 7-Zip website.
To download files to your desktop machine, firstly zip the required files/folders into a single ZIP file, then simply click on the relevant file name in the ‘My files’ window. The file will then be transferred into the 'Downloads' folder on your desktop machine.
After you have finished running your Flexcom simulations and have saved your data, you should ensure to log out and terminate the session.

Please note the following:
•It is your responsibility to log out. Your organisation will continue to be billed per hour if you forget to log out.
•Simply closing your internet browser does not constitute logging out.
Ideally it should happen very rarely, cloud service providers can experience unplanned outages, service disruptions and outright downtime. Naturally this lies outside of Wood Group’s control, it is a good idea to have a contingency plan in place. You should always maintain a copy of your Flexcom input files on your local desktop machine. If the cloud server were to collapse during an active user session and the temporary storage lost completely, you would still be able to reproduce the Flexcom output files in a subsequent cloud session.